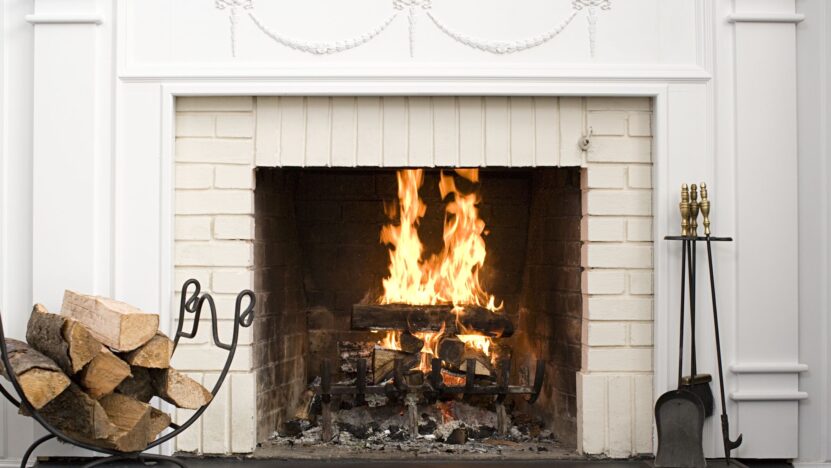
The ambience and warmth of a fireplace are significantly enhanced by its aesthetic components, with fireplace tiles playing a pivotal role. Not only do these tiles add to the overall decor, but they also safeguard the surrounding area from heat and potential damage. This blog post aims to guide homeowners through a meticulous tile replacement process, ensuring both safety and style are paramount.
Assessing Your Fireplace Tiles

Before embarking on a replacement journey, a thorough evaluation of your current fireplace setup is crucial. Tiles that are cracked, chipped, or displaying discoloration can compromise both the appearance and functionality of the fireplace. These signs of wear and damage often indicate the need for a fresh installation, prompting a closer look at material options and design preferences.
Selecting Suitable Fireplace Tile Materials
Choosing the right material is the cornerstone of a successful fireplace facelift. Ceramic tiles are lauded for their heat resistance and extensive design options, while glass tiles offer a contemporary look with a reflective allure. Porcelain, known for its durability, stands up well to high temperatures, and natural stone brings a unique, earthy feel to your space. Each material comes with its own set of advantages and considerations, balancing aesthetics, heat resistance, and maintenance needs.
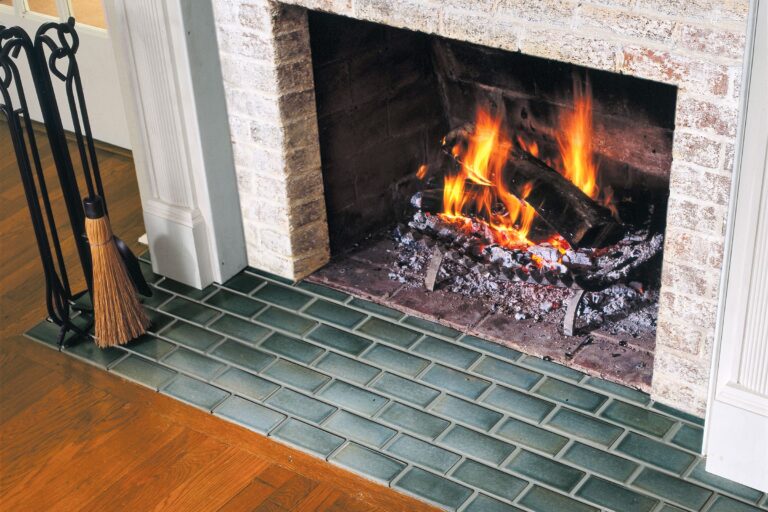
Choosing the Right Tile Style
The style of tile you select should resonate with your personal taste and complement the interior decor. Traditional styles evoke a timeless charm, often featuring intricate patterns and classic colors. Modern tiles, on the other hand, lean towards minimalistic designs and bold, clean lines. For those favoring a cozy, natural environment, rustic tiles with their earthy tones and textured finishes might be the ideal choice. Aligning the tile style with your home’s existing decor creates a cohesive and inviting atmosphere. If you’re not having the best of timing selecting the directions and style you want to pick, make sure that you don’t hesitate and visit this link.
Measuring and Calculating Tile Quantity

Accuracy in measuring the dimensions of your fireplace area is imperative to ensure a seamless tile installation. Measure the height and width of the space to determine the total area to be covered. Remember to factor in additional tiles (about 10% more) to account for cutting and potential breakage. This proactive approach prevents last-minute rushes to the store and ensures a smooth installation process.
Gathering Necessary Tools and Materials
A well-executed tile replacement requires not just the right tiles, but also the appropriate tools and materials. Essential items include a notched trowel for applying adhesive, tile spacers for even placement, and a wet saw for precise cuts. Safety gear, such as gloves and goggles, is paramount to protect against accidental injuries. Additionally, consider the specifics of your chosen tiles, as some materials may necessitate the use of particular adhesives or sealants.
Removing Old Tiles
Removing old tiles requires patience and precision to avoid damage to the underlying surface. Begin by protecting the surrounding area with a drop cloth or plastic sheeting. Use a grout saw to cut through the grout lines, then gently pry the tiles off using a putty knife or a chisel, starting from the outer edge and working inwards. If the tiles are stubborn, applying heat with a heat gun can loosen the adhesive. Keep the work area clean and dispose of debris promptly, ensuring a safe and efficient removal process.
Preparing the Surface
A well-prepared surface is crucial for the successful installation of new fireplace tiles. Start by removing any residual adhesive or mortar, and repair any cracks or uneven areas in the substrate. Ensuring the surface is clean, dry, and level will provide a strong foundation for the new tiles. Use a level and sand down high spots, filling in low spots with a suitable filler. This attention to detail will ensure that the new tiles adhere properly and look even once installed.
Installing New Fireplace Tiles
The installation of new fireplace tiles begins with the careful application of adhesive. Spread the adhesive evenly with a notched trowel, working in small sections to prevent it from drying out. Press the tiles firmly into place, using spacers to maintain consistent gaps for the grout. After the adhesive sets, apply grout into the gaps, wiping away excess with a damp sponge. This process requires a steady hand and an eye for detail to ensure a clean, professional finish.
Tile Layout and Patterns

Choosing the right tile layout and pattern can dramatically affect the overall appearance of your fireplace. Popular options include the classic herringbone, the traditional brick pattern, and the modern vertical stack. Consider the size and shape of the room, as well as the style of the tiles, when selecting a pattern. A well-chosen layout can enhance the visual appeal and create a focal point in the room, making it an essential element of tile installation.
Grouting and Sealing
Grouting is a meticulous process that adds both stability and aesthetics to the tile work. Mix the grout to the right consistency and apply it firmly into the spaces between the tiles, ensuring full coverage. Once the grout has set, clean the surface with a damp cloth to remove any residue. Sealing the grout is a vital step to protect it from moisture and stains, extending the life and beauty of your fireplace tiles. Select a suitable sealer and apply it carefully according to the manufacturer’s instructions.
Final Touches and Cleanup
After the tiles are installed and the grout has dried, it’s time for the final touches. Install any trim or moldings to give a polished look to your fireplace. Inspect the tiles and grout lines for any imperfections and make necessary adjustments. Cleanup is essential for a professional finish; remove any excess materials, and clean the tiles to reveal their beauty. Proper cleanup not only ensures a neat appearance but also highlights the quality of your workmanship.